How to create an Incoming Inspection
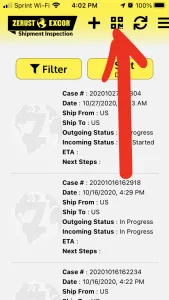
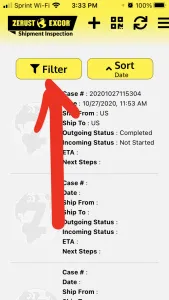
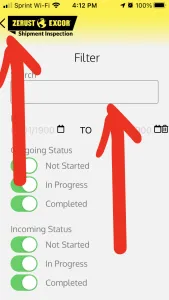
1. After you have received the incoming shipment that requires your inspection. You’ll scan the QR code on the label that is affixed to the outside of the shipment by clicking the search QR code button (see below). If the label has been damaged during transit, you may scan the QR code on the label that was placed inside of the shipment to create the incoming inspection report. If the QR code label was not used, you may go to “Filter” (see below) and input the case number recorded on the piece of paper placed inside of the shipment. (see below)
|
|
|
|
|
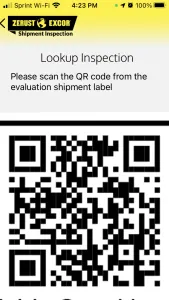
2. After scanning the QR Code (or manually inputting the Case #), you will be brought to the shipment that requires your inspection (See below).
|
|
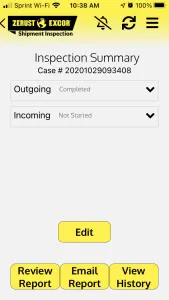
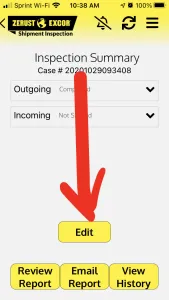
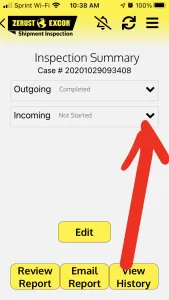
3. Once you’re brought to the shipment inspection summary, you may click on edit (See below), incoming (See below), and then on Self-Information (See below) to start filling out the requested information.
|
|
|
|
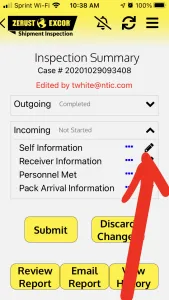
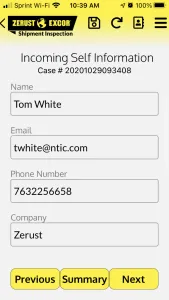
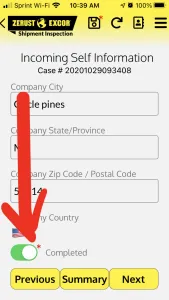
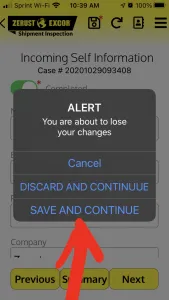
4. You will start filling out the Incoming Self Information (Name, Email, Phone #, Company, Address, and Country) section. This information should auto-populate from the account information you filled out during the app registration process. If you need to change any of that information you may click on any of the fields and edit. Once you have confirmed all your information is correct, you will click on “Completed” (see below) and then on “Next”, which will ask if you want to discard your changes or save and continue. Click “Save and Continue” (see below) to move to the next section.
|
|
|
|
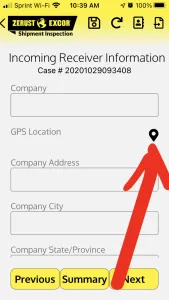
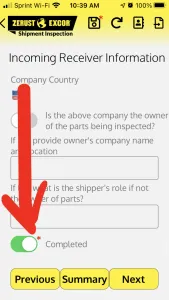
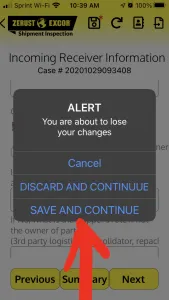
5. After you have completed the Self-Information section, you will be asked to fill out the Incoming Receiver Information (Company, Address, Country, Ect.) (Note: You may click the GPS button to populate the GPS location (see below)). Once you have completed all the questions, you will click on “Completed” (see below) (Note: If you don’t have all the information you need, do NOT click on completed. Leave as unchecked as this will be a reminder that you have information to come back and enter at a later time (see below)) and then on “Next”, which will ask if you want to discard your changes or save and continue. Click “Save and Continue” (see below) to move to the next section.
|
|
|
|
|

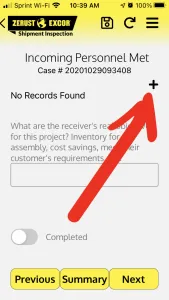
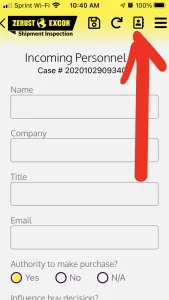
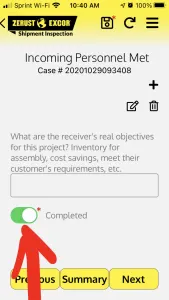
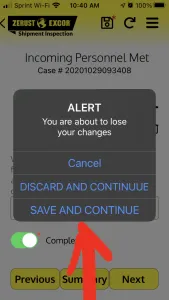
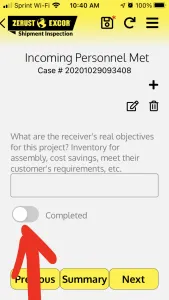
6. After completing the Incoming Receiver Information section, you will now need to enter information for any Incoming Personnel Met at the inspection facility. To add an individual (Name, Company, Title, and Email) click on the + button (see below). If you already have all your contacts information saved in your phone contacts, you may click the contacts button (see below), to auto-populate that information. After entering the individual’s information, click the back button (see below), which will ask if you want to discard your changes or save and continue. Click “Save and Continue” (see below). You may add as many individuals as you need by clicking the + button. Once you have entered all the personnel met, you will click on “Completed” (see below) (Note: If you don’t have all the information you need, do NOT click on completed. Leave as unchecked as this will be a reminder that you have information to come back and enter at a later time (see below)) and then on “Next”, which will ask if you want to discard your changes or save and continue. Click “Save and Continue” (see below) to move to the next section.
|
|

|

|
|
|
|
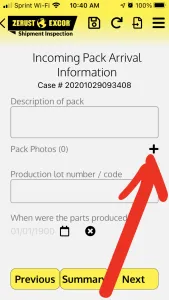
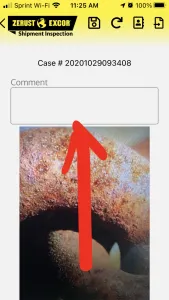
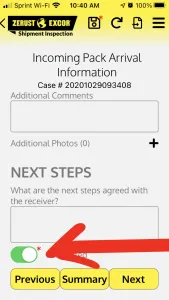
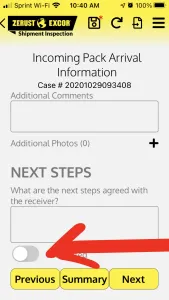
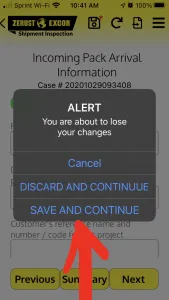
7. After completing the Incoming Personnel Met section, you will now need to enter the Incoming Pack Arrival Information. To add any photos, you may click the + button (see below) to take a picture on your phone. After taking the photo, you will be able to add a comment to that specific photo (see below). Once you have completed all the questions, you will click on “Completed” (see below) (Note: If you don’t have all the information you need, do NOT click on completed. Leave as unchecked as this will be a reminder that you have information to come back and enter at a later time (see below)) and then on “Next”, which will ask if you want to discard your changes or save and continue. Click “Save and Continue” (see below) to move to the next section.
|
|
|
|
|
|
|

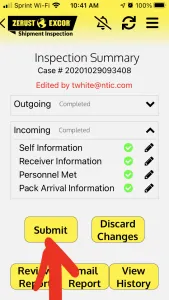
8. After you have fully completed each section of the incoming inspection you may select Submit (see below) to save and advance to emailing the report.
|
|
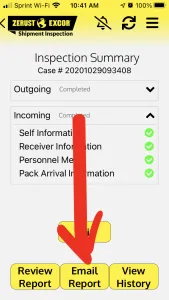
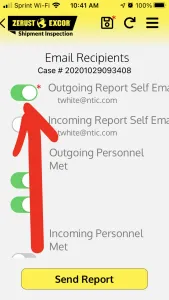
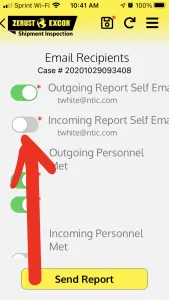
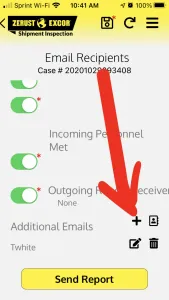
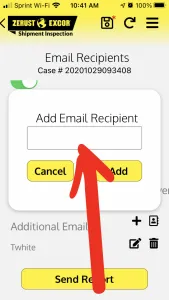
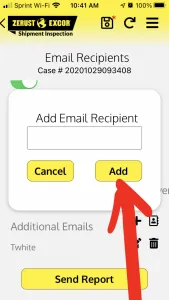
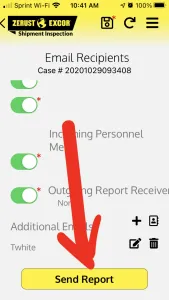
9. After the incoming inspection has been fully completed, you may email the completed PDF inspection report by selecting “Email Report” (see below) from the Inspection Summary page. You will then be brought to the Email Recipients page, which will allow you to email the PDF report to all parties involved, or you may select and unselect certain individuals you would like the report emailed to (see below). If you would like to include an individual that was not included in the inspection report, you may click on the + button on the bottom to add additional email(s) (see below). You will then enter the additional email in the form (see below), and then click “Add” to add that email to the report (see below). After you have selected all the emails you would like the completed report to be sent to, you will select “Send Report” to send the PDF (see below).
|
|
|
|
|
|
|
|
|
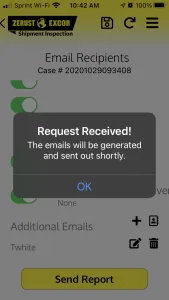
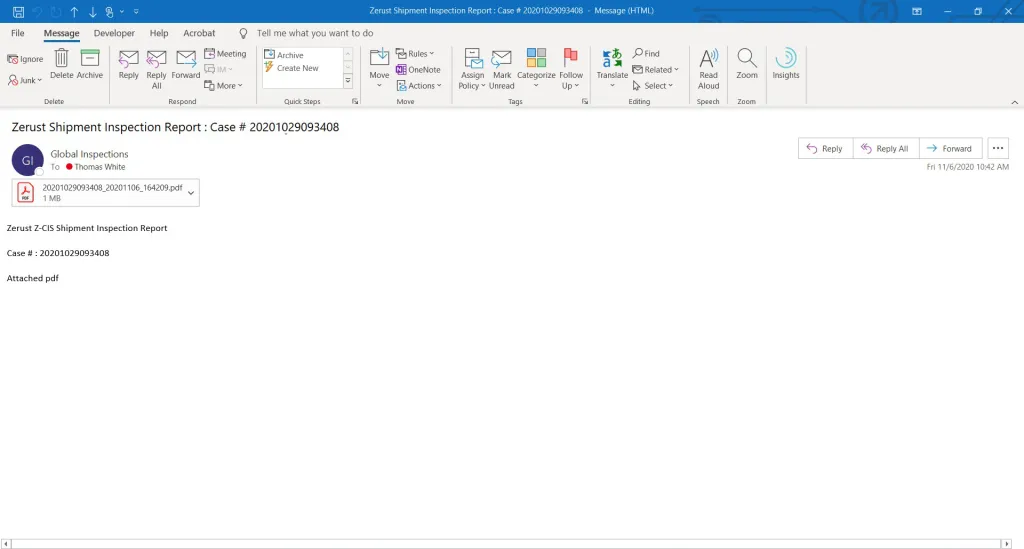
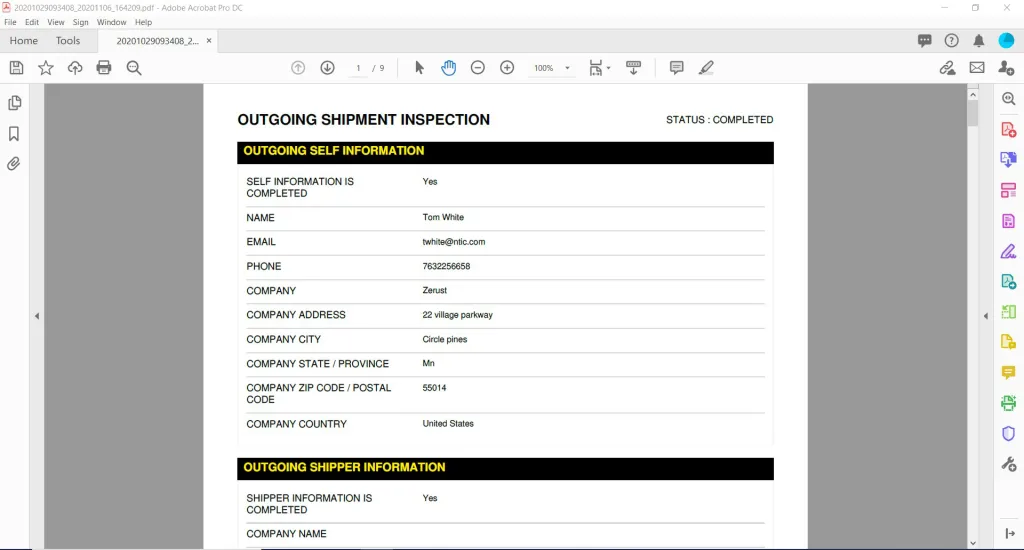
10. After requesting the completed report to be emailed to all parties selected, a completed PDF report will be sent to their inbox (see below).
 |
 |